
Introduction
The Mitsubishi FX5U (aka iQ-F) Programmable Logic Controller takes all the Mitsubishi goodness of simplicity and backwards compatibility then adds a wealth of connectivity options with its built-in Ethernet port. These include a basic graphical Web Server, FTP Server, MODBUS/TCP and SLMP (aka MC Protocol) drivers.
 |
| Example of Web Page served up by the FX5U |
This guide serves as an introduction to the tool, basic settings and procedures, with the intention to get the simplest web page up and running from your FX5U PLC.
Software
Your hurdle is actually discovering the tool exists (helping you with that here!) ...and then getting a copy. It's actually free software from Mitsubishi FA (Factory Automation).

The prescribed approach to getting the software is to contact your Mitsubishi FA local office and request it.
There are two versions of the tool available, the original 32-Bit version and the newer 64-Bit version. And these are the package names you should be looking for...

...where 101b is the 64-Bit version and 100a is the 32-Bit version
As well as the Operating System version requirements, the 64-Bit version adds some editor feature improvements, and significantly, allows us to reduce the web page refresh rate down from 5 seconds to 1 second - should that be an essential requirement (bearing in mind the extra load on the PLC).
Note! Both versions can be used with any compatible FX5U PLC
SD Card
Whilst the default System Web Pages are served by the FX5U from the PLC standard hardware, for your User Web Pages you will need to fit a SD Card into the slot on the front of the PLC. The SD Card can be up to 32 Gb and will hold the entire web site you create, including resources such as PDF files.
 |
| A full size 4 to 32 Gb SD Card |
Once we have the SD Card available, we need to format its file system in a specific way. For this, it must be inserted into your PC (or attached card reader), and using Windows Explorer, create the following empty folder structure in the root of the card...

This only needs done the once.
After this, we could continuously use the PC/card reader to revise all updates to our web site pages - or we could now leave the SD Card in the FX5U and use FTP to do updates over the network. So, we'll look at this option next.
Web Server/FTP Server Setup
To enable the FX5U Web Server, please review the details in a previous post, and ensure you set up a User with a password, and enable them to access both System and User Pages with the "Permit Both Displays" setting...

Now, to additionally enable the FTP Server, in GX Works3, browse to the FTP Server node under Project > Parameter > FX5CPU > Module Parameter > Ethernet Port...

Then set the function to "Use" the FTP Server, and note the default Login Name: FXCPU and finally, set the "Allow Online Change" to enable...

That's it! Download to, and then reboot the PLC to commit the changes.
All we need to know now is the IP Address of the PLC, the Login Name, and the default password (which, to save you trawling all through the documentation) is also actually "FXCPU" 😏
Create a Web Page
Let's now create our first web page, add a web control and upload it to the PLC.
Start the Web Design Tool (which is installed in C:\WSVDT, not Program Files)...

You'll probably get hit with the User Access Control caution, press "Yes" to continue.
With the app loaded let's choose Project > Create Project...

Select the PLC type...

| New blank project screen |
As an example, let's say we want to display a value, perhaps the total of a counter. And let's say that counter value is being written to PLC store D0. From the PLC Components palette, click and drag a Data Block control onto your web page...

It will default to D0 (both for text and PLC store)...

If you want to change the PLC store then select the control and click the Settings button...

From here we can change the store, displayed text, value format and so forth...


Press [OK] when all done.
Upload the Web Page

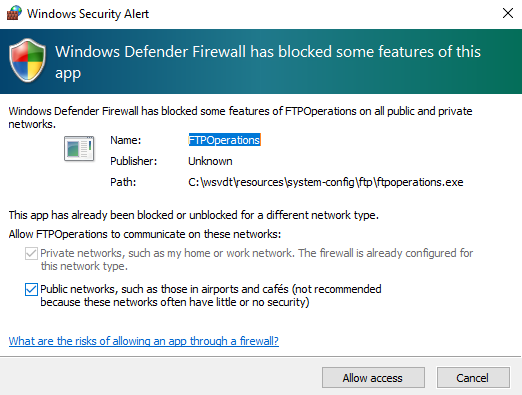
So [Allow access] then continue...


Yay! 👏


As an aside, despite the last message shown above, the PLC (in this example at least) never needs reset, and in fact, if a web browser is already attached to the web page, just hitting "refresh" is enough to update.
Test the Web Page


